
How To Install A Sensor Faucet
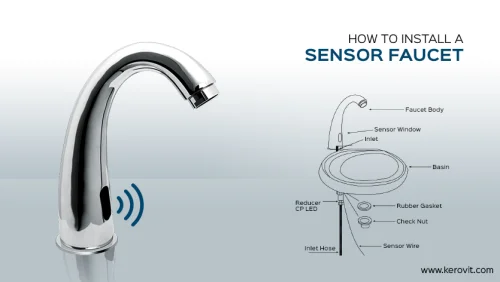
Sensor faucets are commonly known as automatic faucet or touchless faucet or motion sensing faucet. These faucets come equipped with a sensor and mechanism that allows water to flow in response to the hand’s presence in closeness to the faucet.
Having a sensor faucet in your bathroom has become an essential need nowadays as it requires no touching therefore, transmitting of germs and bacteria can be avoided. Installing a sensor faucet in your bathroom is a very easy process, you just need a sufficient water-supply pressure.
Steps for Installing a Sensor Faucet
- Carefully remove the Sensor faucet from its packaging box.
- Take the sensor tap and connect the faucet’s flexible hose and tighten firmly.
- Adjust the flexible hose and sensor signal cable through the washbasin’s hole.
- Securely fix the sensor tap to your required position on the washbasin.
- Strongly attach all the fittings provided, tighten the sensor tap to the basin.
- Open the battery section and insert 4x AA alkaline batteries.
- Connect flexible pipe from the tap the ‘outlet’ point of the control unit.
- Connect the sensor cable from your faucet to the control unit.
- Your sensor faucet is now connected and will work.
The best part about the sensor faucet is that it works on either of a power mode. When both power modes connected, it will work on AC & if there is a power failure it will switch to DC automatically.
If you would like to know more about installation of a sensor faucet in your bathroom, you can connect with us on our toll-free 1800110059 or you can share your contact and location details with us. One of our team member from the concerned department will contact you.